How to Choose the Right Drill Bits for Every Material
Choosing the right Drill Bits begins with understanding the material, not the packaging. Wood, steel, masonry, glass, and composites each resist drilling differently. A sharp brad-point bit can enter pine cleanly, while a cobalt twist bit handles heat-resistant steel more effectively. Masonry demands carbide, steady pressure, and controlled speed. Small details matter.
Industry reports support this practical approach. Grand View Research and MarketsandMarkets both identify rising demand for advanced cutting tools, driven by construction, automotive production, aerospace manufacturing, and maintenance work. Their research also highlights longer tool life, improved productivity, and material-specific performance as major purchasing factors. The exact market forecasts differ, however. That difference deserves attention. Market estimates depend on definitions, regions, and reporting methods.
Machining researcher Tony Schmitz offers a useful warning: “Tool choice is a system decision, not a catalog guess.” The statement fits drilling perfectly. Bit geometry, coating, diameter, feed pressure, machine stability, and cooling must work together. A titanium-coated bit may look versatile, yet it can perform poorly in hardened steel without suitable geometry and speed control. Even experienced users occasionally choose convenience over evidence. That mistake creates heat, wandering holes, broken edges, and premature wear. This guide explains how to match Drill Bits with real materials, practical workshop conditions, and measurable drilling goals. It also questions common assumptions, because no selection chart can replace observing chips, listening to the cut, and checking the finished hole.
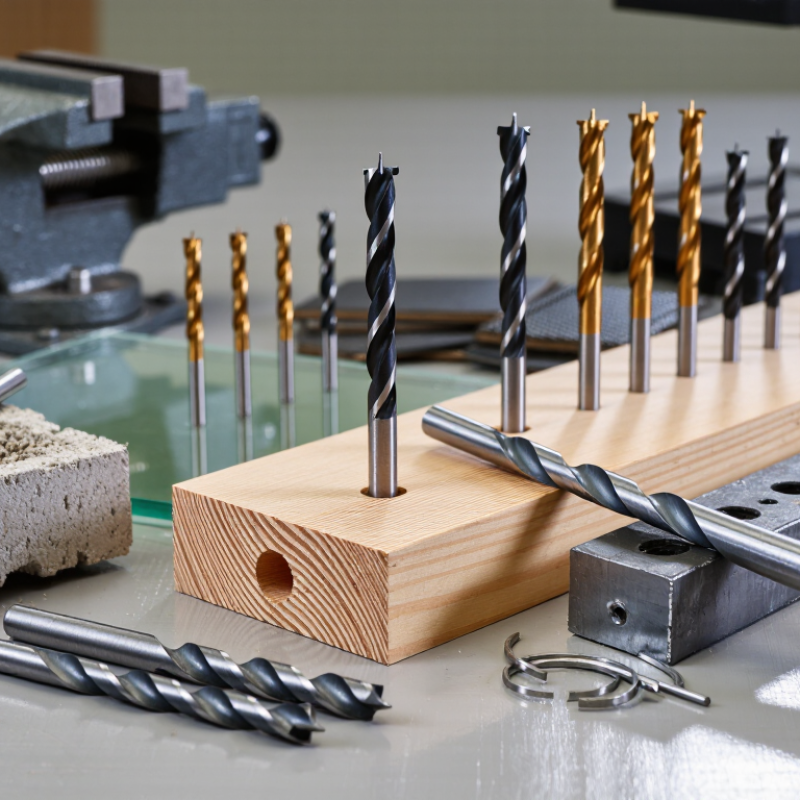
Understanding Drill Bit Types and Their Intended Materials
How to Choose the Right Drill Bits for Every Material
Understanding Drill Bit Types and Their Intended Materials
Choosing a drill bit starts with identifying the material, not the drill itself. A bit designed for wood may skid, overheat, or break when used on metal. In my workshop experience, matching the cutting edge to the surface prevents most avoidable damage. Start with the material. Then check its thickness and hardness.
Twist bits suit general metalwork, thin plastic, and some hardwoods. High-speed steel versions handle mild steel better than ordinary steel bits. For stainless steel, use a sharper, heat-resistant bit and apply steady pressure. Masonry bits have a blunt carbide tip for brick, concrete, and block. They work best with controlled hammer action when the drill allows it.
A brad-point bit makes clean holes in wood because its center point limits wandering. For large, flat-bottomed holes, a spade bit is faster, but it can tear the exit surface.
Glass and ceramic need specialized spear-point or diamond-coated bits. Keep the surface cool with a small amount of water, while avoiding electrical contact. Use low speed. Patience matters here. I once forced a general-purpose bit through tile and created a spiderweb crack around the hole. That shortcut wasted the tile and several minutes.
Even experienced users occasionally choose speed over control. A pilot hole, light pressure, and a sharp bit usually produce a cleaner result. Check the bit for dull edges after each demanding job. A worn tip can make accurate drilling feel mysteriously difficult.
Matching Bit Design to Wood, Metal, Masonry, Glass, and Tile
Choosing a drill bit starts with the material, not the drill. The cutting edge must match how the surface breaks, bends, or resists heat. For wood, use a brad-point bit for clean holes and accurate starting. Its center spur stays in place, while outer spurs reduce splintering. A standard twist bit can work in softwood, but it may wander. For large holes, a spade bit or hole saw removes material quickly.
Metal needs a sharp twist bit designed for cutting steel or aluminum. Use steady pressure and moderate speed; excessive heat can dull the edge. A pilot hole often prevents skating on smooth sheet metal. Masonry requires a carbide-tipped bit and hammer action when the tool permits it. For brick, concrete, and block, clear dust regularly to keep the flutes effective. Glass and tile demand patience. Use a diamond-coated or carbide-tipped bit, slow rotation, light pressure, and cooling water where appropriate. Start with masking tape to reduce slipping, but do not treat it as protection. Porcelain is especially unforgiving, and a rushed hole can crack the tile.
Tips: Match the bit diameter to the anchor, screw, or fitting. Keep separate bits for dusty masonry and clean metalwork. Wear eye protection and check for hidden wires or pipes before drilling. I once forced a dull bit through tile because it seemed faster. The chipped edge proved otherwise. Replace worn bits early, and inspect each test hole carefully. That pause improves accuracy, though I still occasionally choose speed over care.
Selecting the Correct Bit Size, Length, and Shank Style
Choosing a drill bit starts with matching its diameter to the hole and material. Bit size controls fit, strength, and drilling resistance. For pilot holes, choose a diameter slightly smaller than the screw’s core. A hole for a wall anchor needs the exact stated diameter.
Length matters more than many people expect. The bit must reach the required depth without forcing the chuck against the surface. Use the shortest bit that can complete the hole. Short bits flex less and usually produce cleaner results. I once used an extra-long bit for a shallow metal hole. The wobble enlarged the opening, so that shortcut was a poor choice.
The shank must suit both the chuck and the drilling task. Round shanks work well in standard three-jaw chucks. Hex shanks change quickly and resist slipping in compatible holders. Reduced shanks allow larger cutting diameters in smaller chucks, but they still need firm tightening. Check the chuck’s capacity before buying. A bit can be technically suitable yet unusable with the tool.
For wood, leave enough flute length to clear chips. For metal, avoid excessive length and use steady pressure. Masonry drilling often benefits from a sturdy shank and a bit length suited to the anchor depth. I still measure twice, especially near hidden pipes or wiring. Specifications help, but real surfaces can behave differently.
How to Choose the Right Drill Bits for Every Material
Selecting the Correct Bit Size, Length, and Shank Style
The chart shows typical starting speeds for drilling a 6 mm hole. Softer materials generally allow higher RPM, while harder metals require slower speeds and steady cutting pressure. Use a brad-point or twist bit for wood, an HSS twist bit for aluminum and mild steel, and a carbide-tipped masonry bit for brick or concrete.
Choose a bit diameter that matches the hole and fastener, use a longer bit only when the required reach exceeds the standard working length, and select a shank that matches the chuck. Round shanks are common in keyed or keyless chucks, while hex shanks improve grip and reduce slipping in impact-compatible tools.
Values are practical starting points for a 6 mm bit under normal workshop conditions. Actual speed depends on bit material, coating, machine power, lubrication, hole depth, and workpiece thickness.
Using Speed, Pressure, and Cooling for Cleaner Drilling
How to Choose the Right Drill Bits for Every Material
Using Speed, Pressure, and Cooling for Cleaner Drilling
The right bit matters, but technique often decides the result. For steel, use a slower speed and steady pressure. Excessive speed creates heat, softens the cutting edge, and enlarges the hole. For aluminum, a higher speed can work, but pressure must remain controlled. Wood usually needs sharper flutes and faster rotation to clear chips. I still occasionally push too hard when a hole feels slow. That usually leaves a blue mark on the bit and a rough exit hole.
Cooling is not an optional detail. For metal, cutting oil or a suitable water-based fluid reduces friction and carries heat away. OSHA lists a 5 mg/m³ eight-hour exposure limit for mineral-oil mist, so ventilation and responsible fluid control matter. ISO 8688-2 also emphasizes consistent speed, feed, and tool-wear measurements during drilling tests. These controls make results more repeatable, not merely cleaner.
Tips: Start with the bit maker’s recommended speed range, then reduce speed if the bit squeals or discolors. Apply firm, even pressure, rather than forcing the tool. Withdraw the bit briefly to clear chips from deep holes. Use dry drilling only when the material and bit allow it. A small test hole can reveal problems before they become expensive.
Checking Bit Condition and Replacing Worn Cutting Edges
Choosing the right drill bit for wood, metal, masonry, or plastic is only half the job. Bit condition also affects accuracy, safety, and the life of the tool. I inspect every bit before use, even when it looks acceptable in the drawer. Small damage can become obvious under pressure.
Look for rounded cutting edges, chipped corners, rust, or unusual discoloration. Check the shank too. A bent shank often creates wobbling and oversized holes. For metal-cutting twist bits, both cutting lips should appear even and sharp. If one side looks shorter, the bit may cut unevenly. Use sight and gentle touch carefully. Never drag a finger across the edge. Masonry bits need an intact carbide tip, while wood bits should have clean spurs and a clear center point. Dark blue or purple coloring can indicate overheating. It is a warning, not always an automatic failure.
Replace a bit when its edge stays dull after proper cleaning or sharpening. Do not keep forcing it through the material. Excess pressure produces heat, noise, and poor control. A worn bit may still make a hole, but its size and direction can become unreliable. I once reused a dull bit for a small metal bracket. The hole wandered, and the extra correction took longer than replacing the bit. That mistake changed my inspection habit. Some high-quality bits can be professionally resharpened, but cracked, bent, or badly overheated bits should be discarded. Record frequent failures; they may reveal excessive speed, poor lubrication, or the wrong bit type.