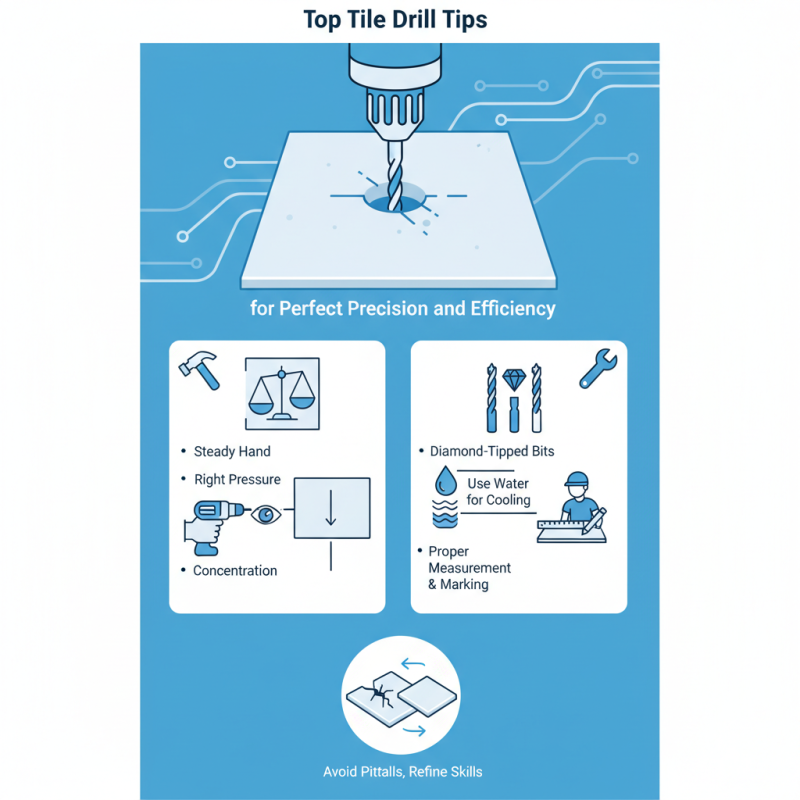
Top Tile Drill Tips for Perfect Precision and Efficiency?
When tackling tile projects, precision is paramount. A well-executed cut can make all the difference. Tile drilling requires skill and knowledge, as poor techniques can lead to cracks or breakage. Mastering the art of tile drill involves understanding your tools and materials.
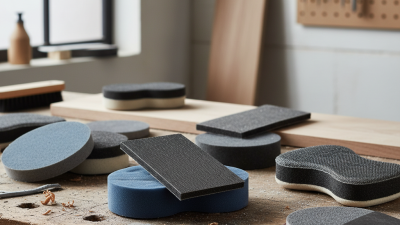
Selecting the right drill bit is crucial. Diamond-tipped bits work best for ceramic and porcelain tiles. However, even the best tools need proper handling. Ensuring a steady hand and the right pressure can prevent mistakes. A moment of distraction can ruin an entire tile.
In this guide, we share expert tips for achieving perfect results with your tile drill. By focusing on preparation and technique, you can enhance both precision and efficiency. It’s essential to be aware of common pitfalls and adjust your methods accordingly. With practice, you can refine your skills and gain confidence in tile drilling.
Understanding the Importance of Precision in Tile Drilling
Precision plays a critical role in tile drilling. Inaccurate drilling can lead to broken tiles and wasted materials. When you miss the mark, the costs can rise quickly. Each hole must be exact to ensure a flawless installation. A small mistake might result in a drip down the wall or gaps between tiles, which are hard to fix later on.
Understanding the tools and techniques available can elevate your precision. Using a quality drill bit is essential. Additionally, marking the tile carefully ensures that each drill begins in the right place. A steady hand is vital, but so is proper support. Without the right support, tiles may slip, causing errors. Even small errors can lead to frustrating setbacks in your project.
Preparation is just as important as execution. Make sure your workspace is clean and organized. Organizing your tools and materials can save you time and reduce errors. Remember that patience is key; rushing through the process often leads to mistakes. Mistakes in drilling are not just learning experiences; they can change the entire outcome of your project.
Choosing the Right Drill Bit for Different Tile Materials
When it comes to drilling tiles, selecting the right drill bit is crucial. Different tile materials, such as ceramic, porcelain, and glass, require specific types of bits for effective drilling. For instance, diamond-tipped bits are recommended for tougher materials like porcelain. According to industry reports, using the appropriate drill bit can increase efficiency by up to 40%, reducing the time spent on projects.
Some common mistakes include using standard bits on tiles, which can lead to chipping and damage. Professional contractors suggest starting with a small pilot hole to guide the larger bit. Another tip is to keep the drill bit cool, ensuring a longer lifespan and better performance. A little water can help maintain temperature and improve accuracy.
Drilling tiles is not always straightforward. Many face issues like cracking or uneven holes. It's important to practice on scrap tiles if you're new to this. Additionally, ensure the surface is clean to avoid slips. With the right bit and a mindful approach, achieving precision becomes more attainable. Experts emphasize the importance of patience and practice in mastering this skill.
Essential Tools and Equipment for Efficient Tile Drilling
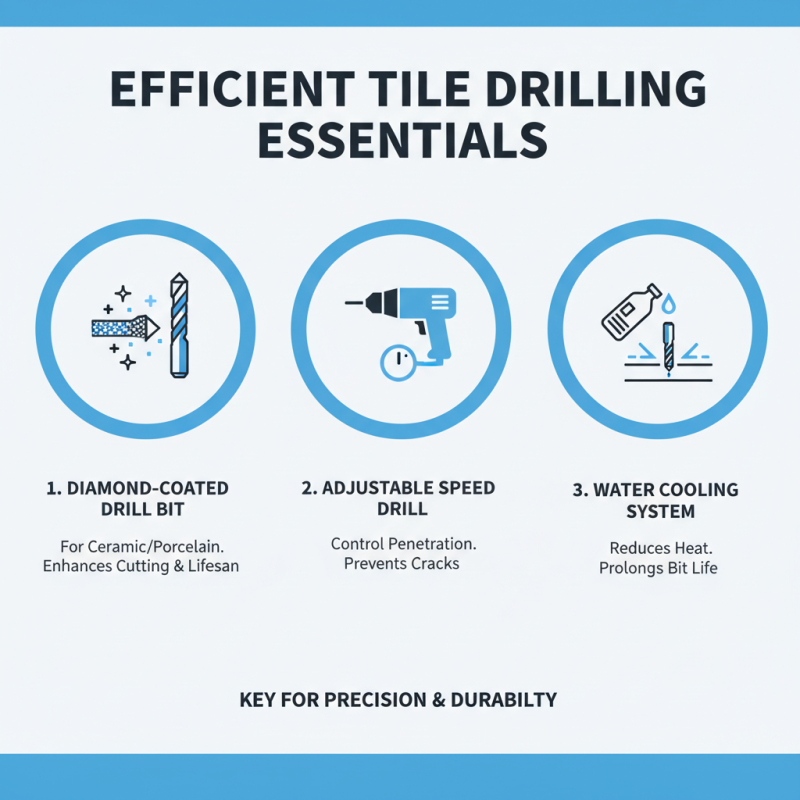
When it comes to tile drilling, having the right tools is crucial for achieving precision. A high-quality drill bit designed for ceramic or porcelain tiles is essential. These bits typically have a diamond coating that enhances cutting efficiency and prolongs the tool's lifespan. Using a drill with adjustable speed settings can also help you control the rate at which you penetrate the tile, preventing cracks.
Consider using a water source to cool the drill bit during the process. This not only reduces heat buildup but also minimizes debris. A spray bottle can serve this purpose effectively. Additionally, securing the tile with clamps can prevent it from shifting as you drill. It may seem minor, but this adjustment can drastically improve accuracy.
Keep in mind that drilling tiles requires practice. Some projects may not turn out perfectly on the first attempt. Mistakes can occur, whether it's a misaligned hole or a chip in the tile's edge. Adapting and refining your technique is a part of the learning journey. With time and the right setup, you will find your rhythm and achieve better results with each project.
Step-by-Step Guide to Preparing for Tile Drilling
Tile drilling requires careful preparation for optimal results. Begin by selecting the right drill bit. A diamond or carbide-tipped bit is essential for effective cutting. Avoid cheap options, as they can lead to frustration and poor performance. Ensure your drill is in good condition. A well-maintained tool enhances precision.
Next, measure and mark your tiles accurately. Use a ruler and a fine pencil for clear markings. Consider using painter's tape to create a stable guide. This helps prevent the drill bit from wandering. Additionally, securing the tile can reduce movement. Use clamps or a non-slip mat to hold the tile steady.
It's also important to keep your drilling area clean and organized. Dust can hinder visibility and safety. Wear safety goggles to protect your eyes. Remember, the process can produce uneven results. Take your time and adjust your technique as needed. Learning from each attempt can lead to improvement. Focus on getting it right rather than rushing through the task.
Top Tile Drill Tips for Perfect Precision and Efficiency
| Tip Number |
Tip Description |
Expected Outcome |
| 1 |
Use the right drill bit for tile type. |
Improved drilling efficiency and reduced risk of damage. |
| 2 |
Mark the drilling spot with a pencil. |
Increased accuracy in hole placement. |
| 3 |
Apply painter’s tape to the tile surface. |
Prevents slipping and enhances precision. |
| 4 |
Keep the drill at a low speed. |
Reduces heat buildup and minimizes cracks. |
| 5 |
Use water to cool the drill bit. |
Enhances the lifespan of the drill bit. |
Techniques to Ensure Accurate and Clean Holes in Tiles
Drilling into tiles requires precision and the right technique to avoid chips and cracks. Accurate hole placement ensures a clean finish and prevents costly mistakes. According to the Tile Council of North America, nearly 40% of tile failures originate from improper installation methods. Understanding how to drill correctly can save you from these pitfalls.
Start by marking your drill points clearly. Use a fine-tipped marker on the tile to ensure visibility. This small step significantly impacts your overall precision. When setting your drill speed, err on the side of caution. A slower speed often leads to better control and reduces the risk of damaging the tile. Utilizing a drill bit designed specifically for ceramics can enhance performance and efficiency.
Consider using water as a coolant while drilling. This technique not only reduces heat but also minimizes dust. A study by the International Journal of Ceramic Engineering highlights that using water can decrease the likelihood of cracks by up to 70%. Regularly check the drill bit for wear and replace it as needed. Worn bits can lead to uneven holes, necessitating a second attempt, which may not always yield a cleaner result.
Top Tile Drill Tips for Perfect Precision and Efficiency