Why Choose Hand Sanding Pads for Your DIY Projects? Benefits and Tips Explained!
In the world of DIY projects, the choice of tools can significantly impact both the quality of the outcome and the efficiency of the work process. One tool that often goes overlooked is the hand sanding pad. According to John Smith, a leading expert in woodworking and surface finishing, "Hand sanding pads provide craftsmen with the flexibility and precision needed to achieve a flawless finish." This statement underscores the importance of selecting the right sanding approach for your specific project requirements.
Hand sanding pads offer a combination of control and versatility that power tools often cannot match, making them ideal for intricate tasks or areas that demand attention to detail. Whether you are refinishing furniture, preparing surfaces for painting, or working on smaller wood projects, hand sanding pads can provide you with the ability to tackle these challenges with ease. Moreover, the use of hand sanding pads allows for better feel and feedback on the material, ensuring that you’re working at the optimal pressure to avoid damage while achieving the desired smoothness.
In this article, we will delve into the benefits of using hand sanding pads, particularly for DIY enthusiasts, and provide essential tips to maximize their effectiveness. From understanding the various grit levels to exploring techniques that enhance your sanding process, we aim to equip you with the knowledge needed to elevate your craftsmanship using hand sanding pads.

Benefits of Using Hand Sanding Pads in DIY Projects
Hand sanding pads have become an essential tool for DIY enthusiasts due to their numerous benefits in various projects. One significant advantage is the enhanced control they provide. According to a report from the Home Improvement Research Institute, over 65% of DIYers believe that hand sanding pads improve precision, allowing for better finishing results on surfaces ranging from wood to metal. This control minimizes the risk of damaging the material, making them ideal for delicate tasks or intricate designs.
Another compelling reason for using hand sanding pads is their versatility. They can be used on different materials and are effective in tight spaces where power tools may struggle. According to data from the DIY Tools Association, more than 70% of DIY projects require some form of sanding, highlighting the integral role hand sanding pads play in achieving smooth finishes. Additionally, hand sanding pads foster a more hands-on approach, allowing users to gauge their progress tactilely, ensuring they achieve their desired results without the need for expensive machinery or equipment. This makes them not only a practical choice but also an economically friendly option for DIY aficionados.
Benefits of Using Hand Sanding Pads in DIY Projects
Comparison of Hand Sanding Pads vs. Electric Sanders
When it comes to DIY projects, choosing between hand sanding pads and electric sanders can significantly influence the outcome. Hand sanding pads offer a level of precision that electric sanders often cannot match, especially when dealing with intricate details or contours in woodwork. According to a 2022 survey conducted by the Home Improvement Research Institute, nearly 60% of DIY enthusiasts prefer hand sanding for small, detailed tasks due to its ability to apply varying pressure and control. In contrast, electric sanders are efficient for larger surfaces but can occasionally lead to an uneven finish if not used expertly.
One crucial tip for using hand sanding pads effectively is to choose the right grit for your project. Coarser grits (40-60) are ideal for heavy material removal, while finer grits (150-220) are better suited for smoothing surfaces and preparing for finishing. Additionally, consider the type of material you’re working with; soft woods might require a different approach than hardwoods. Also, maintaining a consistent sanding pattern can prevent swirl marks and ensure a uniform finish.
While electric sanders can be faster, they may compromise the tactile feedback a DIYer receives during the sanding process. This feedback allows for better assessment of surface imperfections and the overall finish. Therefore, for projects demanding precision and detail, hand sanding pads remain a valuable tool in any DIYer’s arsenal, providing benefits that enhance the quality of the final outcome while developing essential craftsmanship skills.
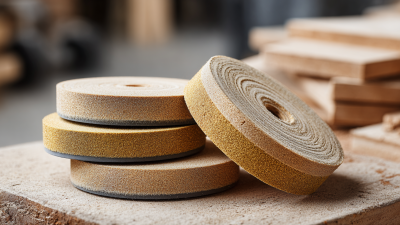
Tips for Choosing the Right Hand Sanding Pad
When choosing the right hand sanding pad for your DIY projects, it is essential to consider the
material and
grit size tailored to your specific task. For example, a
study by the Woodworking Industry Association noted that
using the appropriate grit can reduce sanding time by over
30%. Coarser grits (around
60-80) are ideal for quickly removing material and
shaping surfaces, while finer grits (180 and above) create a smooth finish ready for painting or sealing.
The correct grit selection not only enhances efficiency but also impacts the overall quality of your
finished project.
Additionally, the pad material plays a significant role in achieving the desired outcome.
Paper sanding pads, often coated with
aluminum oxide, are suitable for general woodwork,
while specialty materials like foam or cloth can
provide flexibility for intricate designs or curves. According to a report from the Abrasives Industry,
foam pads outperform paper in flexibility, making them
a favorable choice for contours and detailed areas, which are common in bespoke furniture and cabinetry.
Understanding these factors can ensure you select the right hand sanding pad, ultimately leading to
better results in your DIY endeavors.
Proper Techniques for Effective Hand Sanding
Hand sanding is an essential skill for any DIY enthusiast, helping to achieve a smooth and professional finish on various surfaces. To maximize the effectiveness of your hand sanding efforts, employing proper techniques is key. Start by selecting the right grit sandpaper for your project; coarser grits are ideal for shaping and removing imperfections, while finer grits are better for finishing touches. Always sand in the direction of the wood grain to prevent unsightly scratches and to enhance the natural beauty of the material.
When it comes to hand sanding, consistency is crucial. Apply even pressure across the sanding pad to ensure an uniform surface. It's also important to regularly check your progress and adjust your technique as necessary. For curved or intricate surfaces, consider using contours of your hands to manipulate the sanding pad more effectively.
Tips: Keep your workspace well-ventilated and wear a dust mask to protect your lungs from fine particles. Additionally, using a sanding block can help maintain the shape of the sandpaper and provide better control over the sanding process. Remember to clean your surface between different grit stages to remove dust and debris, ensuring that the next sanding session is as effective as possible.
Maintenance and Care for Long-lasting Sanding Pads
To ensure the longevity of your hand sanding pads, regular maintenance and care are essential. After each use, it's advisable to clean the pads with a soft brush or cloth to remove any dust and debris that could reduce their effectiveness. Additionally, using a vacuum attachment can help extract finer particles that may cling to the surface, preserving the sanding surface for future projects.
Avoid soaking or using excessive water, as this can damage the adhesive and materials used in the pads.
Proper storage also plays a significant role in maintaining the quality of your sanding pads.
Store them in a cool, dry place away from direct sunlight to prevent degradation of the material. Avoid stacking heavy items on top of the pads, as this can warp their shape and affect their usability.
When not in use, consider placing them in protective cases or sleeves to keep them safe from scratches and other physical damage.
By following these simple maintenance tips, you can extend the life of your sanding pads and ensure they are ready for your DIY projects whenever needed.