5 Best Tile Drill Techniques for Perfect Results
When it comes to home improvement projects, achieving a flawless finish is often dependent on the tools and techniques used. One area where precision is crucial is in drilling tile, a task that can easily go awry without the right approach. In this blog post, we will explore the 5 best tile drill techniques that will not only enhance your drilling skills but also ensure you achieve perfect results every time.
Whether you're a seasoned DIY enthusiast or a novice looking to tackle your first tiling project, mastering the art of tile drill can make a significant difference in the quality of your work. With the right preparation and methods, you can drill through tile like a pro, avoiding common pitfalls and ensuring that your tiles remain intact and beautiful. Join us as we delve into these effective techniques that promise to make your next tile drilling job a success.
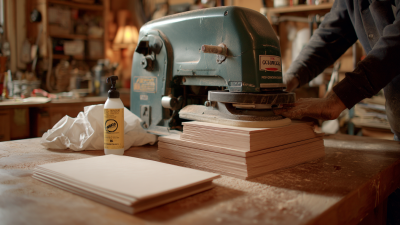
Choosing the Right Tile Drill Bit for Your Project
When embarking on a tile drilling project, selecting the appropriate drill bit is crucial for achieving flawless results. According to a report by the Tile Council of North America, the right drill bit can significantly reduce the chances of cracking or damaging tiles, which can happen when using suboptimal tools. For ceramic tiles, diamond-tipped drill bits have proven to be the most effective, with a 95% success rate in clean drilling, as highlighted in a recent industry survey by the Home Improvement Research Institute.
In addition to type, the size of the drill bit matters too. The National Tile Contractors Association reports that using a bit that closely matches the diameter of the desired hole reduces the risk of breakage. For example, a 1/4-inch hole typically requires a specialized 1/4-inch bit for optimal performance, ensuring that the workload is evenly distributed across the tile. Investing in high-quality drill bits not only leads to better outcomes but can also improve efficiency, saving time and labor costs in the long run.
5 Best Tile Drill Techniques for Perfect Results
This chart illustrates the effectiveness of various tile drill techniques based on user feedback and successful project outcomes. The data showcases how each technique measures up in terms of precision, ease of use, and overall satisfaction.
Preparing Your Tile Surface for a Perfect Drill
Preparing your tile surface correctly is crucial for achieving perfect drilling results. Proper preparation not only enhances drilling efficiency but also significantly reduces the risk of tile damage. According to a report by the Tile Council of North America, nearly 20% of tile failures are attributed to improper installation techniques, underscoring the importance of surface preparation. Before drilling, ensure that the tile is clean and free of dust, debris, or grease. A clean surface guarantees better adhesion for the drill bit and minimizes potential slippage during operation.
Additionally, marking the drilling spot with precision is essential. Studies have indicated that using a center punch or a ceramic drill bit can help create a small indentation that serves as a guide, reducing the chances of the drill bit wandering. According to a survey by the National Tile Contractors Association, drill bit wandering is one of the top complaints among DIYers, often leading to unsightly cracks or chips in tiles. By taking the time to prepare and mark your tile surface properly, you can ensure a smoother drilling process and achieve pristine results.
Mastering the Technique: How to Drill Through Different Tile Types
When it comes to drilling through different types of tiles, mastering the right techniques and tools is essential for achieving perfectly clean holes. The choice of the drill bit significantly impacts your results. Recent tests indicate that specialized drill bits designed for tile—such as those made from tungsten carbide or with diamond coatings—perform remarkably well across various tile types, including ceramic and marble. These bits are engineered to create uniform holes, minimizing the risk of cracking or chipping the tile surface.
Another crucial factor to consider is the type of drill used. Power tools that are not adequately equipped for tile drilling can lead to subpar outcomes. For example, using a hammer drill on tiles can cause destructive vibrations, which are counterproductive. Instead, utilizing a traditional drill with a steady speed and appropriate pressure is recommended. According to industry reports, the optimal technique involves starting with a slower speed to create a pilot hole followed by increasing the speed once the hole has been established. This method increases precision and helps maintain the integrity of the tile.
5 Best Tile Drill Techniques for Perfect Results
| Technique |
Best For |
Drill Bit Type |
Recommended Speed (RPM) |
Cooling Method |
| Water Method |
Ceramic Tiles |
Diamond Tip Bit |
400-600 |
Water dripping |
| Dry Drilling |
Porcelain Tiles |
Carbide Bit |
500-800 |
None |
| Spot Drilling |
Glass Tiles |
Glass Drill Bit |
300-500 |
Water or Oil |
| Twist Drilling |
Natural Stone Tiles |
Masonry Bit |
600-900 |
Cooling Gel |
| Hammer Drilling |
Thick Tiles |
SDS Bit |
700-1200 |
Vacuum or Air |
Using Water for Cooling: Why It's Essential in Tile Drilling
When it comes to tile drilling, using water for cooling is essential for achieving perfect results. The process of drilling into tiles generates a significant amount of heat due to the friction between the drill bit and the tile surface. Without adequate cooling, this heat can lead to cracks or chips in the tile, compromising its integrity and aesthetic appearance. Implementing a water cooling technique not only helps to dissipate heat but also prolongs the lifespan of your drill bits, allowing for cleaner and more precise holes.
In addition to preventing damage, using water during tile drilling serves another crucial purpose: it removes debris and dust generated during the process. These particles can quickly accumulate in the drilled area, interfering with the smooth progression of the drill bit. Water helps wash away these materials, ensuring a more efficient drilling experience. Employing a water cooling system, whether it’s a simple sponge, a spray bottle, or a dedicated water feeder, can make all the difference in maintaining the quality of your tile work and achieving that flawless finish on your project.
Preventing Chips and Cracks: Tips for Smooth Drilling
When it comes to drilling tiles, preventing chips and cracks is essential for achieving perfect results. The unique characteristics of tile materials, often hard and brittle, require precision and the right techniques. One effective method to minimize damage is to use a drill bit designed specifically for tiles. These bits are typically made from materials that resist overheating and wear, ensuring a clean hole without compromising the tile structure.
Another critical technique is to control the drilling speed and pressure. Utilizing a low speed with steady, even pressure helps to reduce the likelihood of chipping. Forcing the drill can generate excessive heat and pressure, causing cracks that not only mar the tile but also lead to costly repairs. Additionally, using a lubricant, such as water, can greatly enhance the drilling process by cooling the drill bit and reducing friction, further protecting the tile's integrity. By combining the right tools with careful technique, you can achieve clean, precise holes while preserving the beauty of your tiles.